Build and Boot AGL Flutter Instrument Cluster demo image made for GSoC
0. Prepare Your Build Host
- Install the required tools to build an AGL Image. For detailed explanation, check Preparing Your Build host
1. Define Your Top-Level Directory
$ export AGL_TOP=$HOME/AGL
$ echo 'export AGL_TOP=$HOME/AGL' >> $HOME/.bashrc
$ mkdir -p $AGL_TOP
2. Download the repo Tool and Set Permissions
$ mkdir -p $HOME/bin
$ export PATH=$HOME/bin:$PATH
$ echo 'export PATH=$HOME/bin:$PATH' >> $HOME/.bashrc
$ curl https://storage.googleapis.com/git-repo-downloads/repo > $HOME/bin/repo
$ chmod a+x $HOME/bin/repo
3. Download the AGL Source Files
To download the latest pike branch AGL files, use the following commands:
$ cd $AGL_TOP
$ mkdir pike
$ cd pike
$ repo init -n pike -u https://gerrit.automotivelinux.org/gerrit/AGL/AGL-repo
$ repo sync
4. Initialize the build environment using aglsetup.sh Script
To initialize the build environment, we must use the setup script. This script is available here:
$ $AGL_TOP/pike/meta-agl/scripts/aglsetup.sh
$ cd $AGL_TOP
$ source pike/meta-agl/scripts/aglsetup.sh -b build-flutter-cluster -m qemux86-64 agl-demo agl-devel
-
Here
-bis used to specify the build directory and-mis used to specify the target platform. -
Running this script, will create a build directory if it does not exist. Default build directory:
$AGL_TOP/pike/build-flutter-cluster - Default target paltform:
qemux86-64
** NOTE: Set the API key in local.conf **
- By default navigation will not work, you need to set your openrouteservie API key to the variable
OPENROUTE_API_KEYin your local.conf -
It is present at
$AGL_TOP/pike/build-flutter-cluster/conf/local.conf -
Example: Just add
OPENROUTE_API_KEY = "your_openrouteservice_api_key"to the end of local.conf
5. Using BitBake
$ cd $AGL_TOP/pike/build-flutter-cluster
$ source agl-init-build-env
$ bitbake agl-cluster-demo-platform-flutter
6. Deploying the AGL Demo Image
Boot the image using QEMU
$ cd $AGL_TOP/pike/build-flutter-cluster
$ source agl-init-build-env
$ runqemu kvm serialstdio slirp publicvnc
6. Run the Graphics
To get graphics of the app, you need VNC client like VNC Viewer or Vinagre
- Open the VNC client
- Enter the server address as
localhost:0
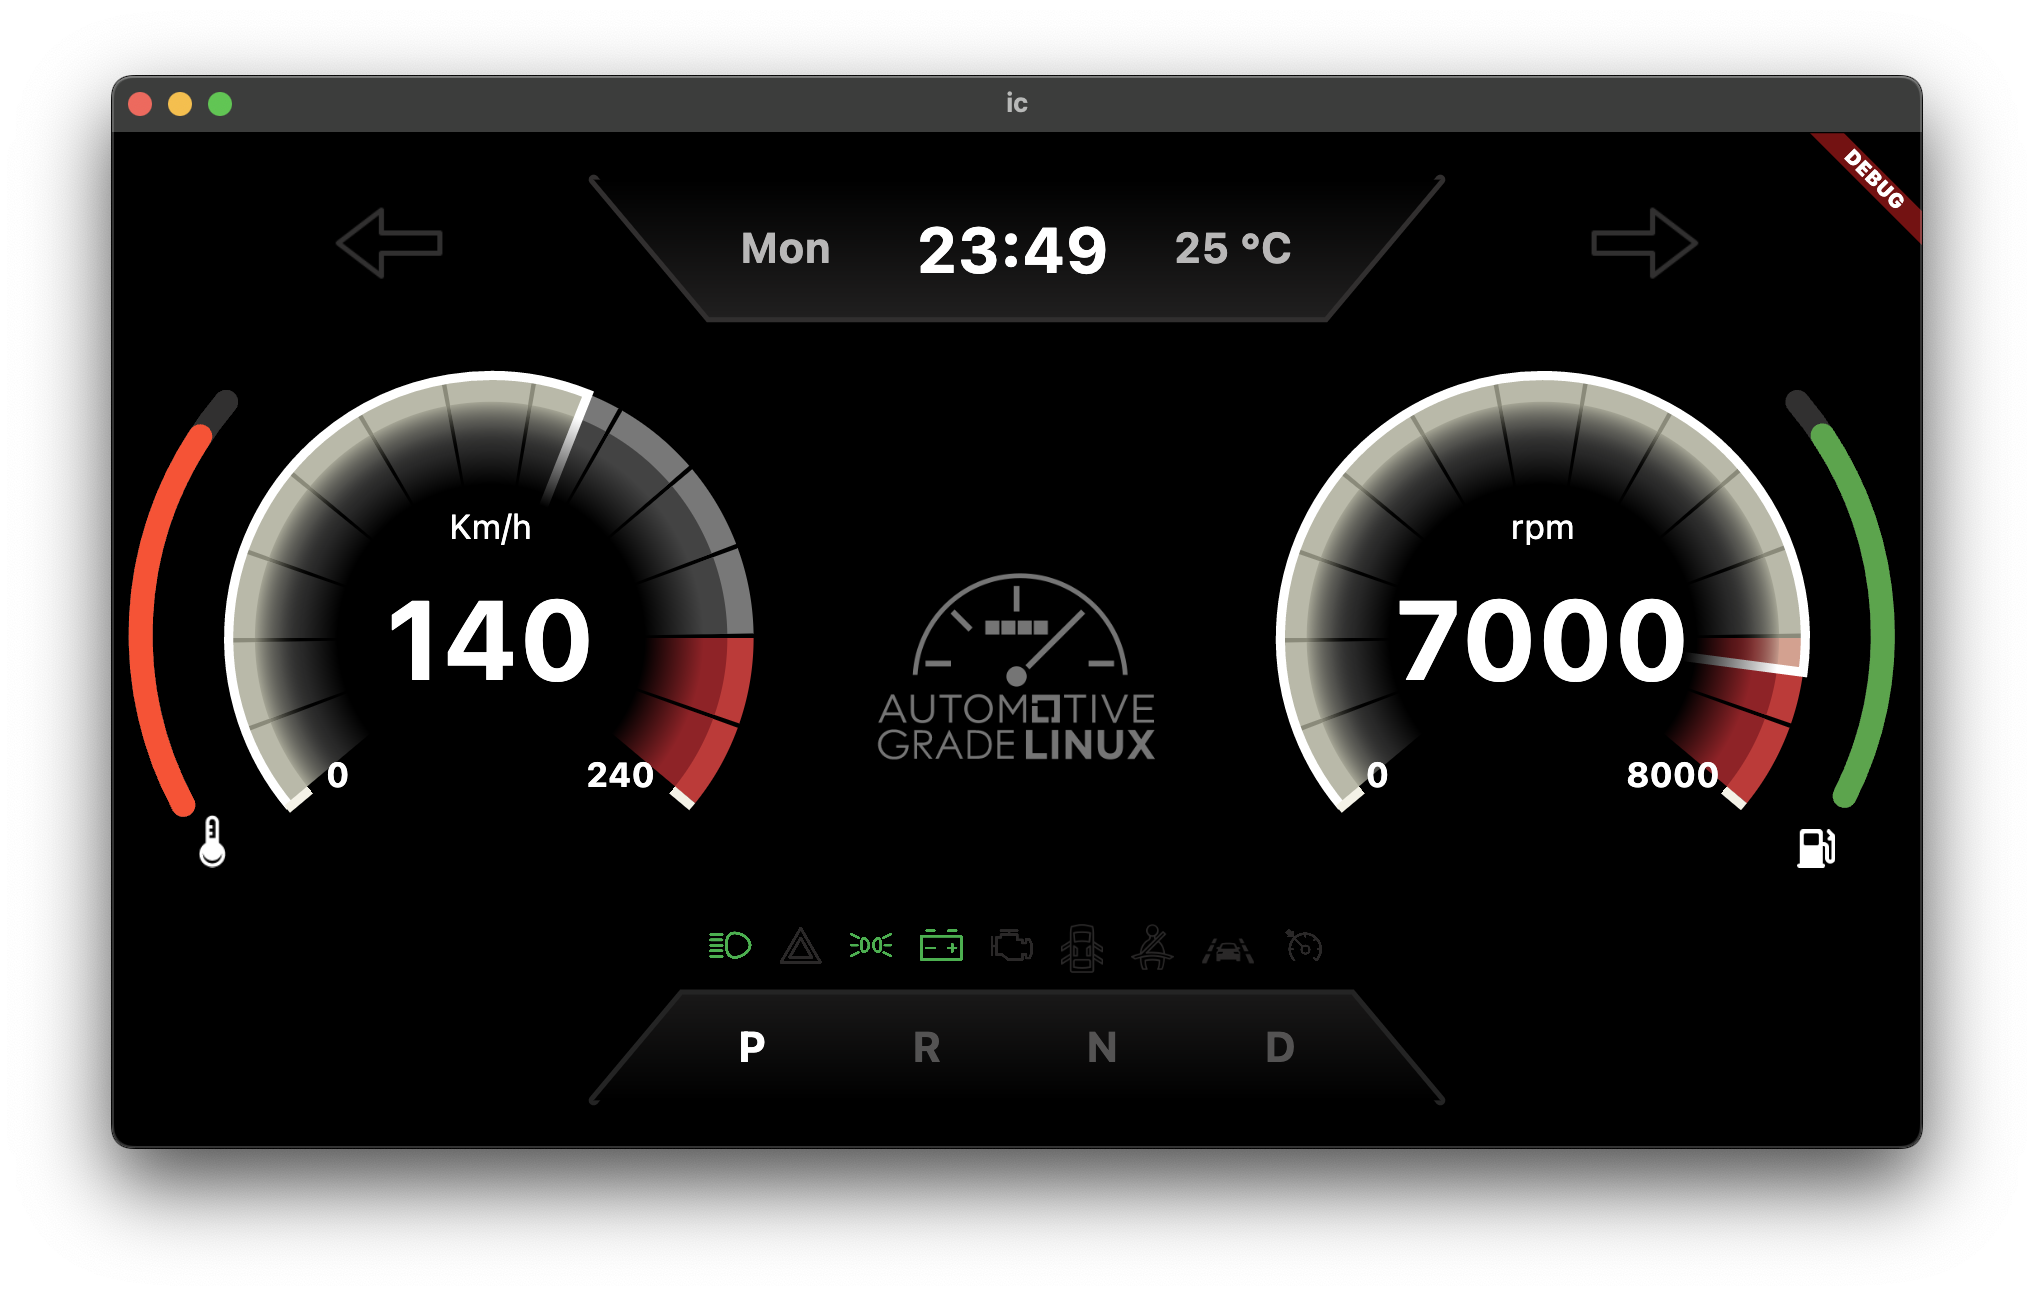
That's it, you should get something like this:
7. To start navigation widget
To get the navigation, you need to use kuksa_viss_client or kuksa_vss_init.py script.
Using inbuilt kuksa_vss_init.py script
After running the build, you should get this:
Automotive Grade Linux 13.93.0 qemux86-64 ttyS0

qemux86-64 login:
Login as root
qemux86-64 login: root
root@qemux86-64:~# /usr/sbin/kuksa_vss_init.py
Using kuksa_viss_client
Know more about kuksa_viss_client, Follow this
- Run the kuksa_viss_client
- Authorize using token
Then
Test Client> setValue Vehicle.Cabin.SteeringWheel.Switches.Info true
